Your availability tells mePro which hours you’re open to see clients. You set it once for your regular week, choosing the days and times you work, whether each time is virtual or in person, and how clients can book it. Set this up first. Once your hours are on the calendar, you can share your booking link. Adding breaks and out-of-office time is optional.
Note: All clients, names, emails, appointments and other data shown in the screenshots are sample data we created for this guide. They are not real people or real records.
When to use this
- You’re setting up your calendar for the first time.
- Your regular working hours change.
- You want to change which hours are virtual, in person or bookable online.
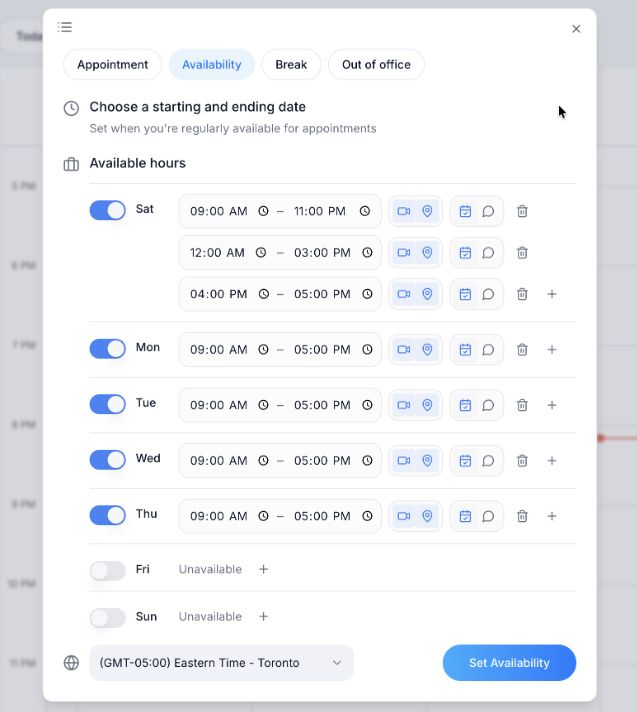
Steps
1. In the left sidebar, click Pro Calendar. Your calendar opens on the current week.
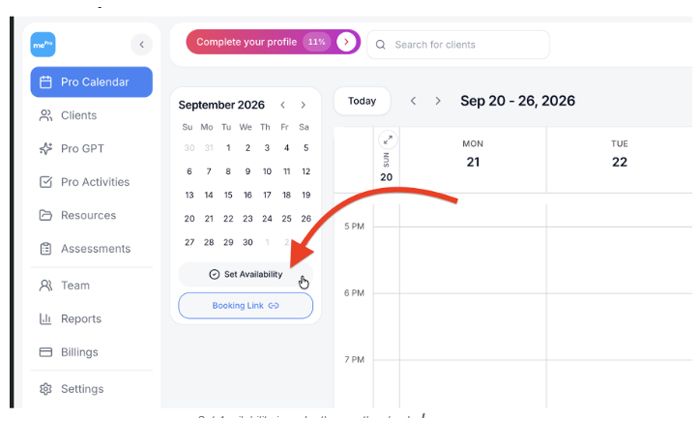
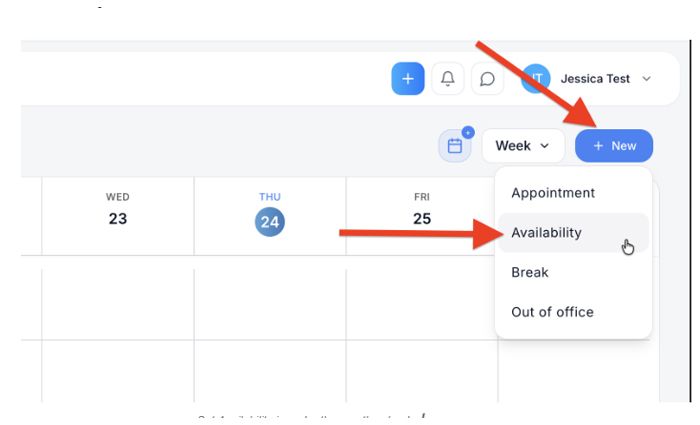
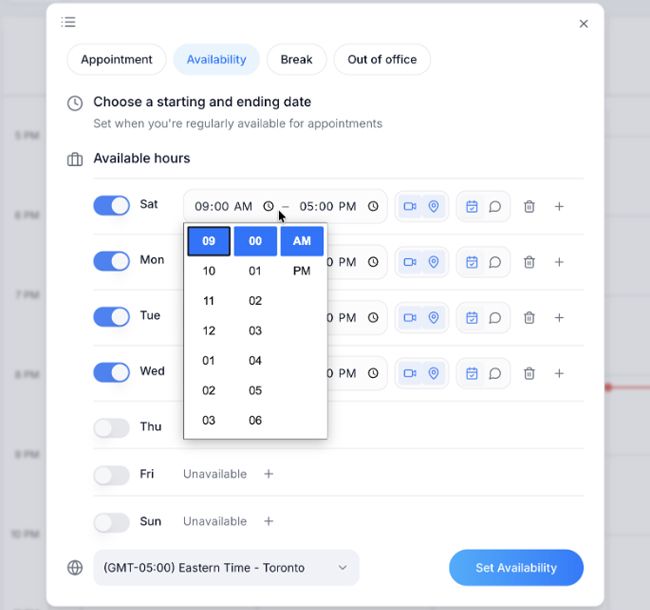
2. Under the small month calendar, click Set Availability. The availability form opens with the Availability tab highlighted. You can also open it from the top right of the calendar: click + New, then choose Availability.
3. Look over your week under Available hours. Every day is listed with a switch beside it. Days with no hours set show Unavailable.
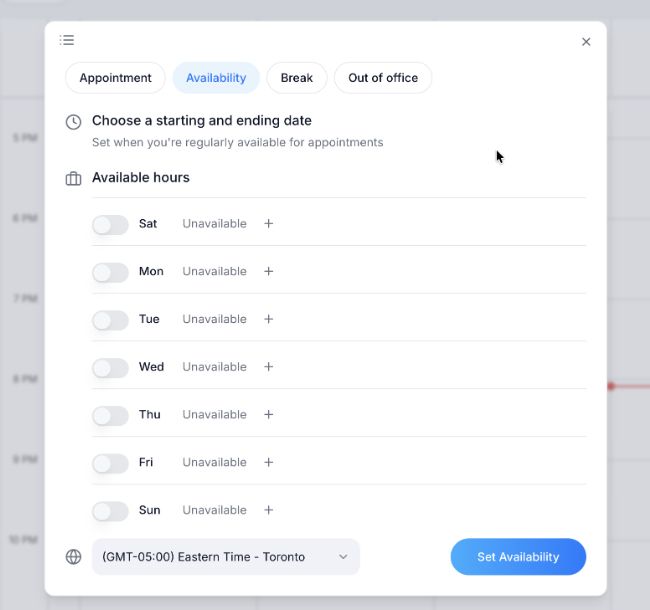
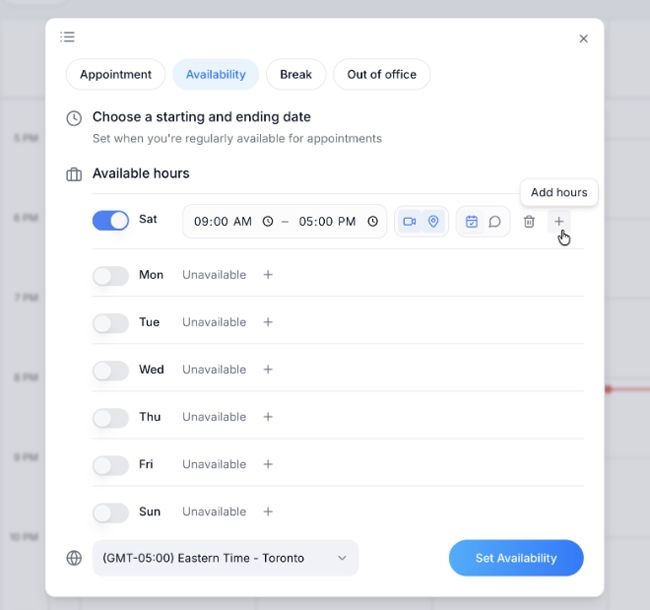
4. Click the switch next to a day you work to turn it on. The switch turns blue and a time range appears for that day, starting at 09:00 AM – 05:00 PM. Repeat for each day you work.
5. Click the clock icon next to the start time to choose when your hours begin, then click the clock icon next to the end time. A list opens with columns for the hour, the minutes and AM or PM. Click a value in each column.
6. Optional: to split a day into parts, click + at the end of the row. Hover over it to see Add hours. A new time range appears under the first one. Use this for a split day, such as a morning block and an evening block with time off in between. You can add more than one; in the example, Saturday has three time ranges. If you don’t want your day split into parts, skip this step and keep one time range for the day.
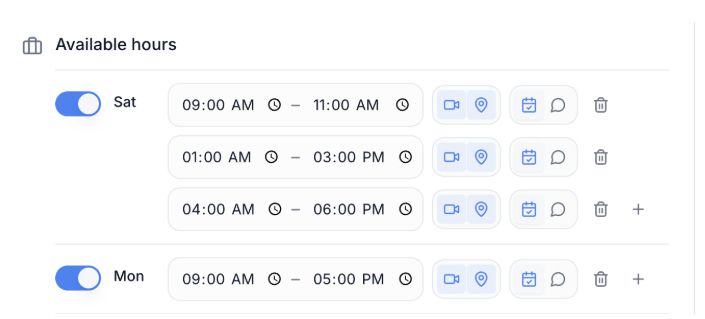
7. Choose the session type for these hours. Click Virtual (camera icon) for online sessions, In person (location pin icon) for sessions at your office, or both. Selected icons have a light blue background.


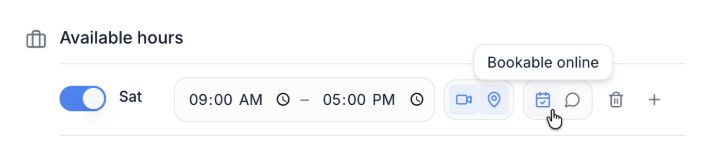
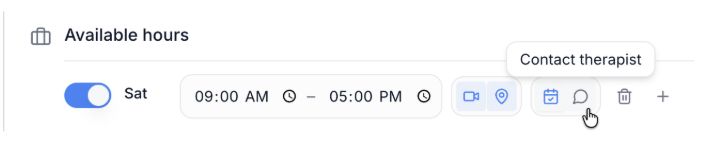
8. Choose whether clients can book these hours online. Select Bookable online (calendar icon) to let clients book these hours themselves through your booking link or the mePro mobile app. Contact therapist (speech bubble icon) sits next to it. In the example, Bookable online is selected.
9. Remove hours you don’t need. To delete one time range, click the trash icon (Remove this time range). To make a whole day unavailable, click its switch to turn it off. The day shows Unavailable again.
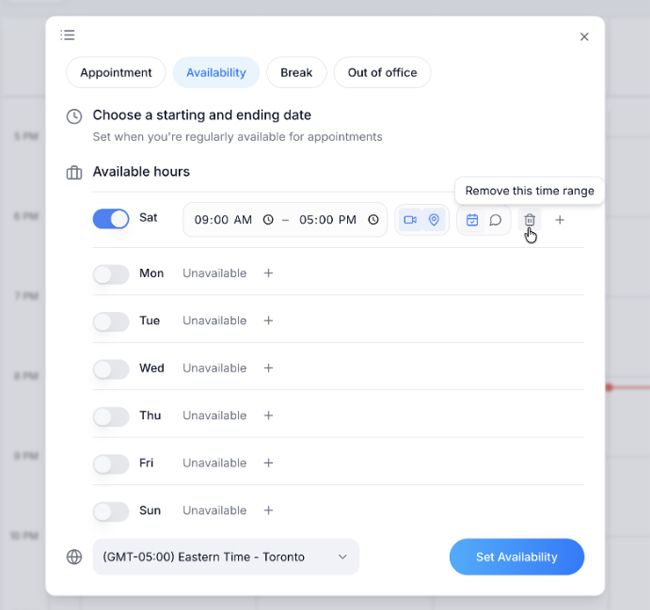
10. Check the time zone at the bottom of the form. Click the time zone, for example (GMT-05:00) Eastern Time - Toronto, and choose the time zone you work in. Your hours are set in this time zone.
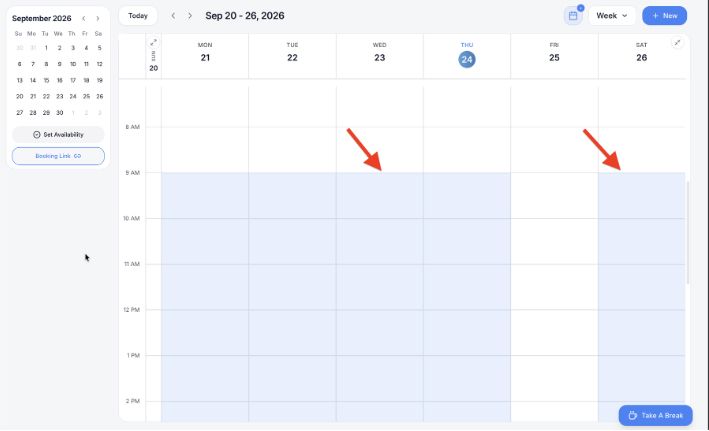
11. Click Set Availability. The form closes and your available hours are shaded light blue on your calendar.
What you’ll see
After you click Set Availability, your calendar shows your working hours in two colours:
- Light blue: hours you’re available. Clients can book these times online, and you can book appointments in them.
- White: hours you’re not available. Clients can’t book these times, and they don’t appear on your booking link.
For example, if you set Monday to 09:00 AM – 05:00 PM, Monday is light blue from 9:00 AM to 5:00 PM. Before 9:00 AM and after 5:00 PM it stays white, so clients can’t book those times.
In the screenshot below, Monday to Thursday and Saturday are light blue from 9:00 AM, because those days are turned on in your availability. Friday is white all day, because Friday is set to Unavailable.
Change your availability later
Click Set Availability again, change your days, times or icons, and click Set Availability to save.
Optional: breaks and out-of-office time
Once your availability is set, you’re ready to take bookings. Setting breaks and out-of-office time is optional. Add them only if you want to block time inside your available hours, such as a lunch break or a personal appointment. See Set breaks and Set out-of-office time.
Tip: If you do add breaks or out-of-office time, set your availability first. It’s easier to see which open hours you’re blocking when your working hours are already on the calendar.