Create an appointment to book a session with a client. While you’re booking, you choose the service, the format AI uses for your clinical note, and whether the session is transcribed. For solo therapists, mePro fills in the Therapist field automatically.
Note: All clients, names, emails, appointments and other data shown in the screenshots are sample data we created for this guide. They are not real people or real records.
When to use this
- You’re booking a session with a new or existing client.
- You’re setting up a series of weekly or monthly sessions.
- You want to choose how AI writes the clinical note and which languages it transcribes before the session.
Steps
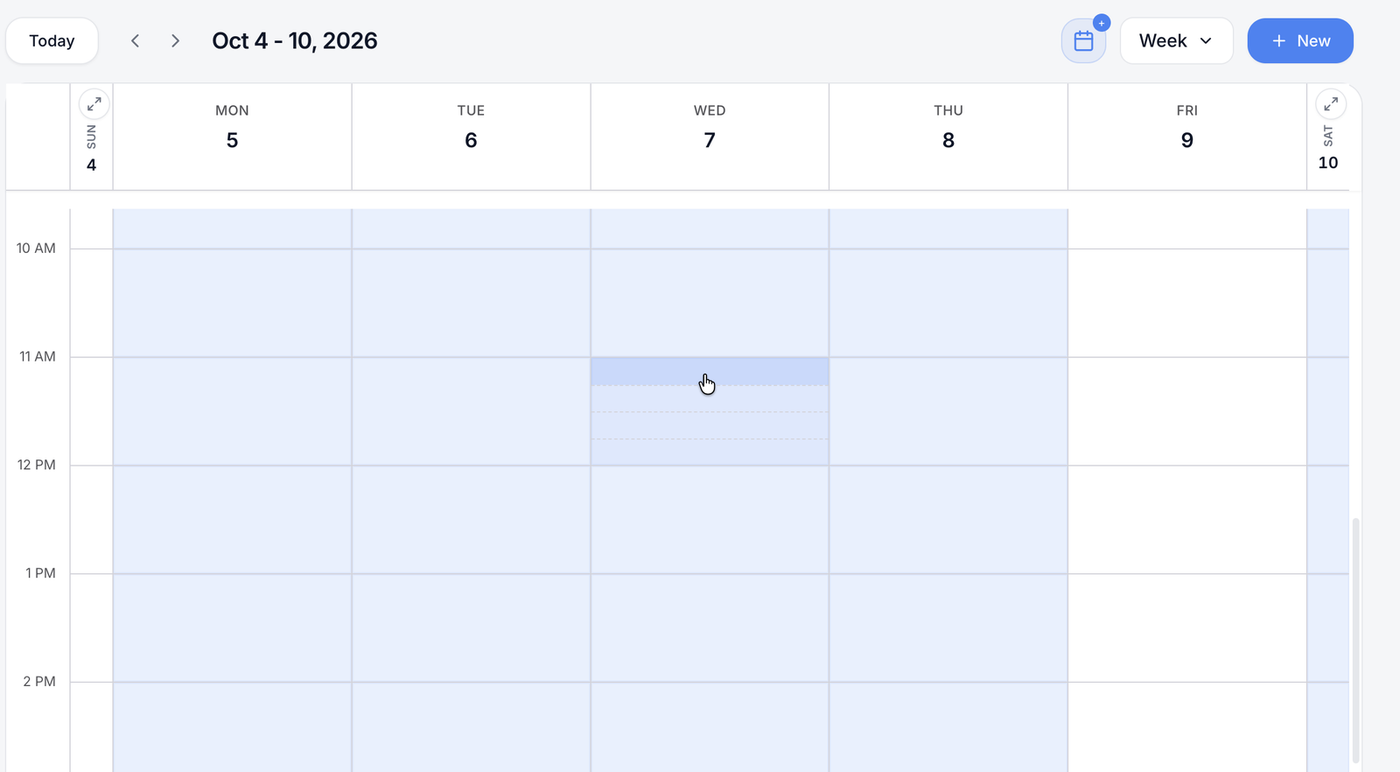
1. In Pro Calendar, click an empty time on the calendar.
The time you click is highlighted, and the appointment form opens with that date and time already filled in.
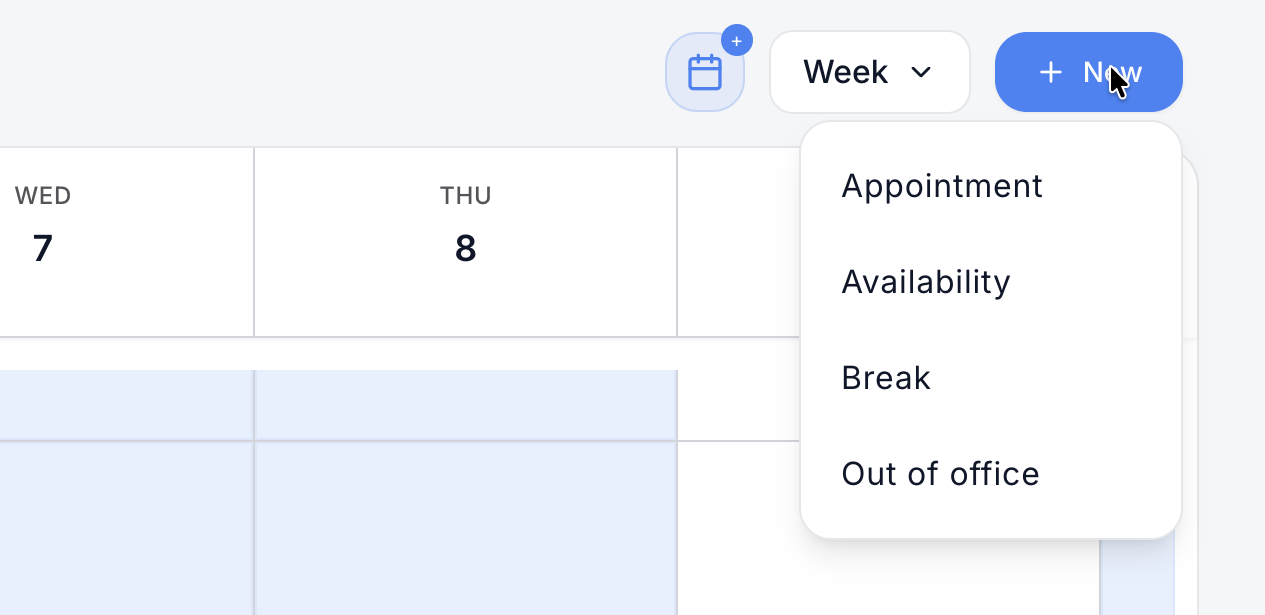
2. Or click + New in the top right, then choose Appointment.
The appointment form opens with the Appointment tab highlighted.
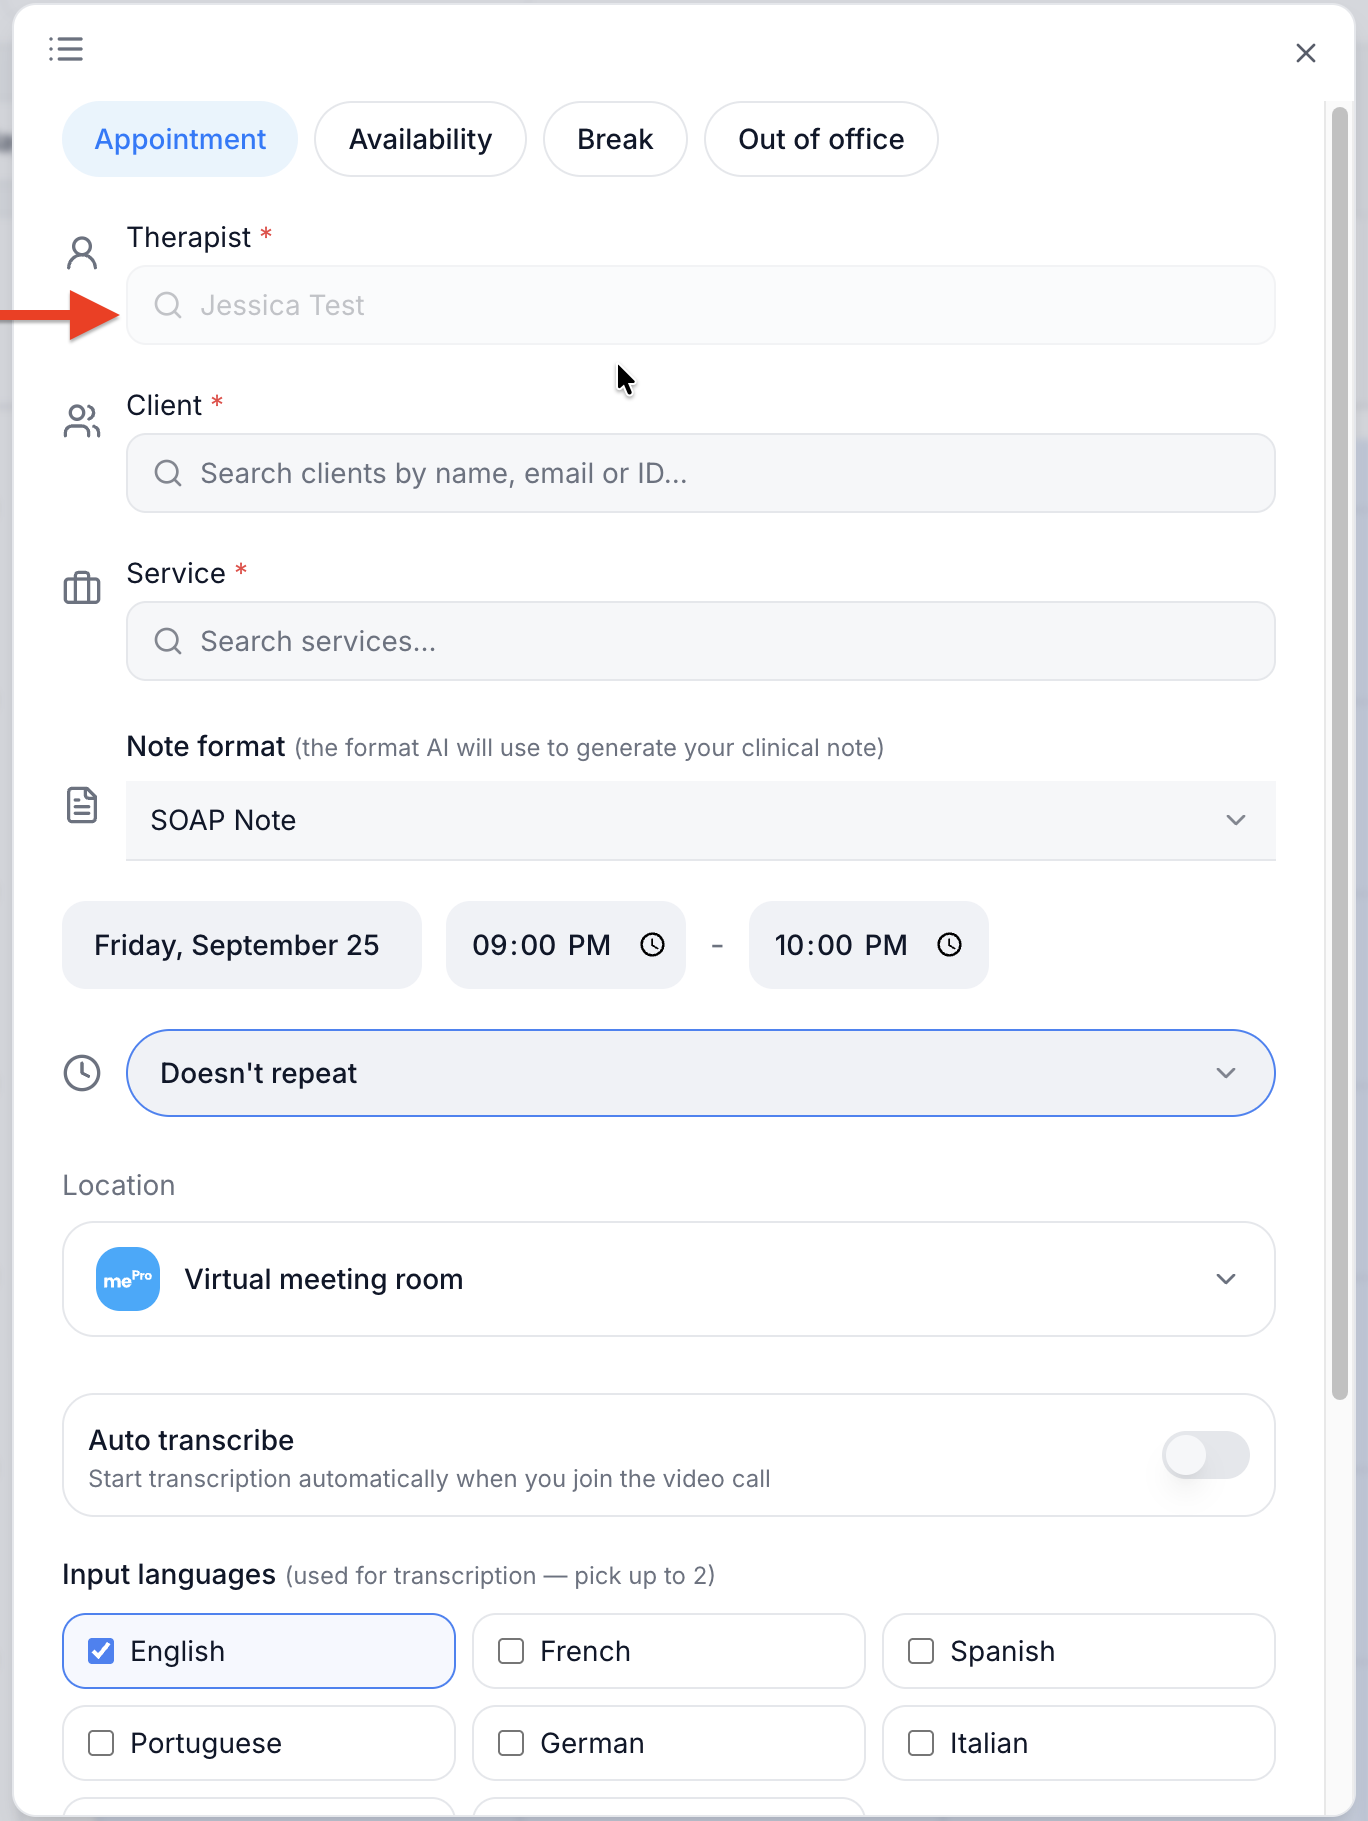
3 Check the Therapist field.
If you work on your own, your name is already filled in.
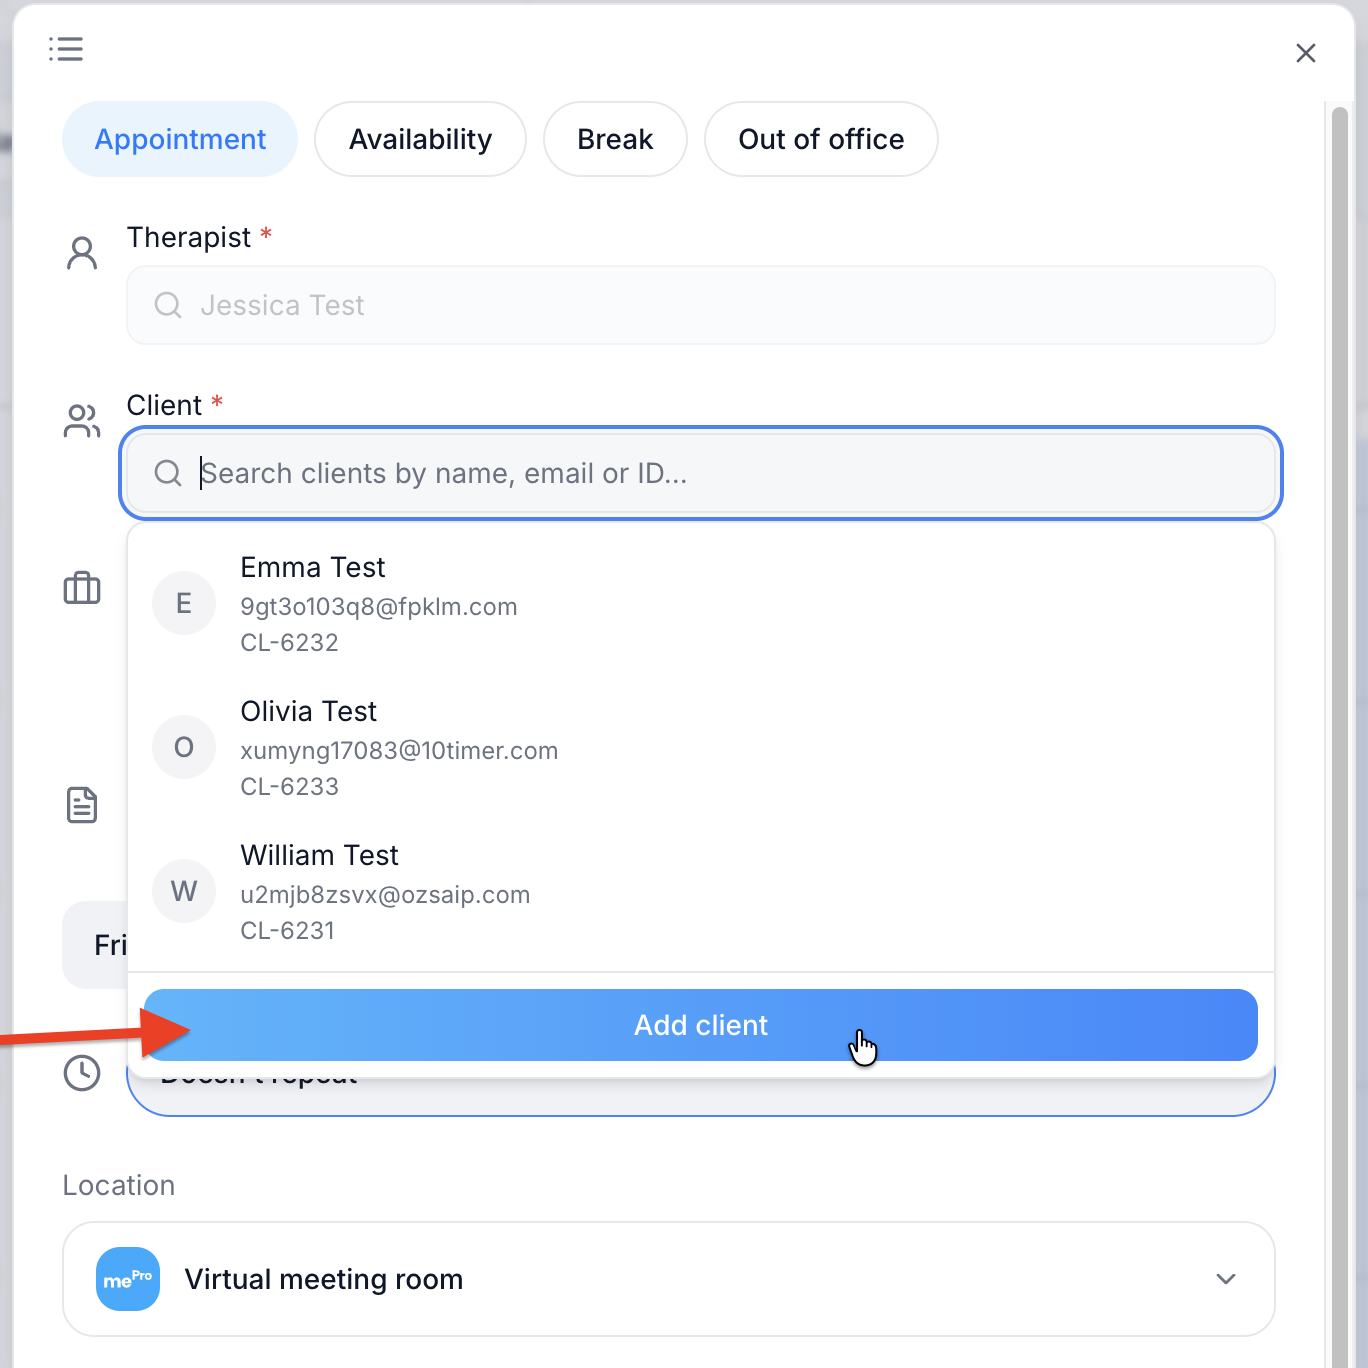
4. Click Client and choose the client.
A list of your clients opens, showing each client’s name, email and client ID. Type a name, email or ID to search, then click the client.
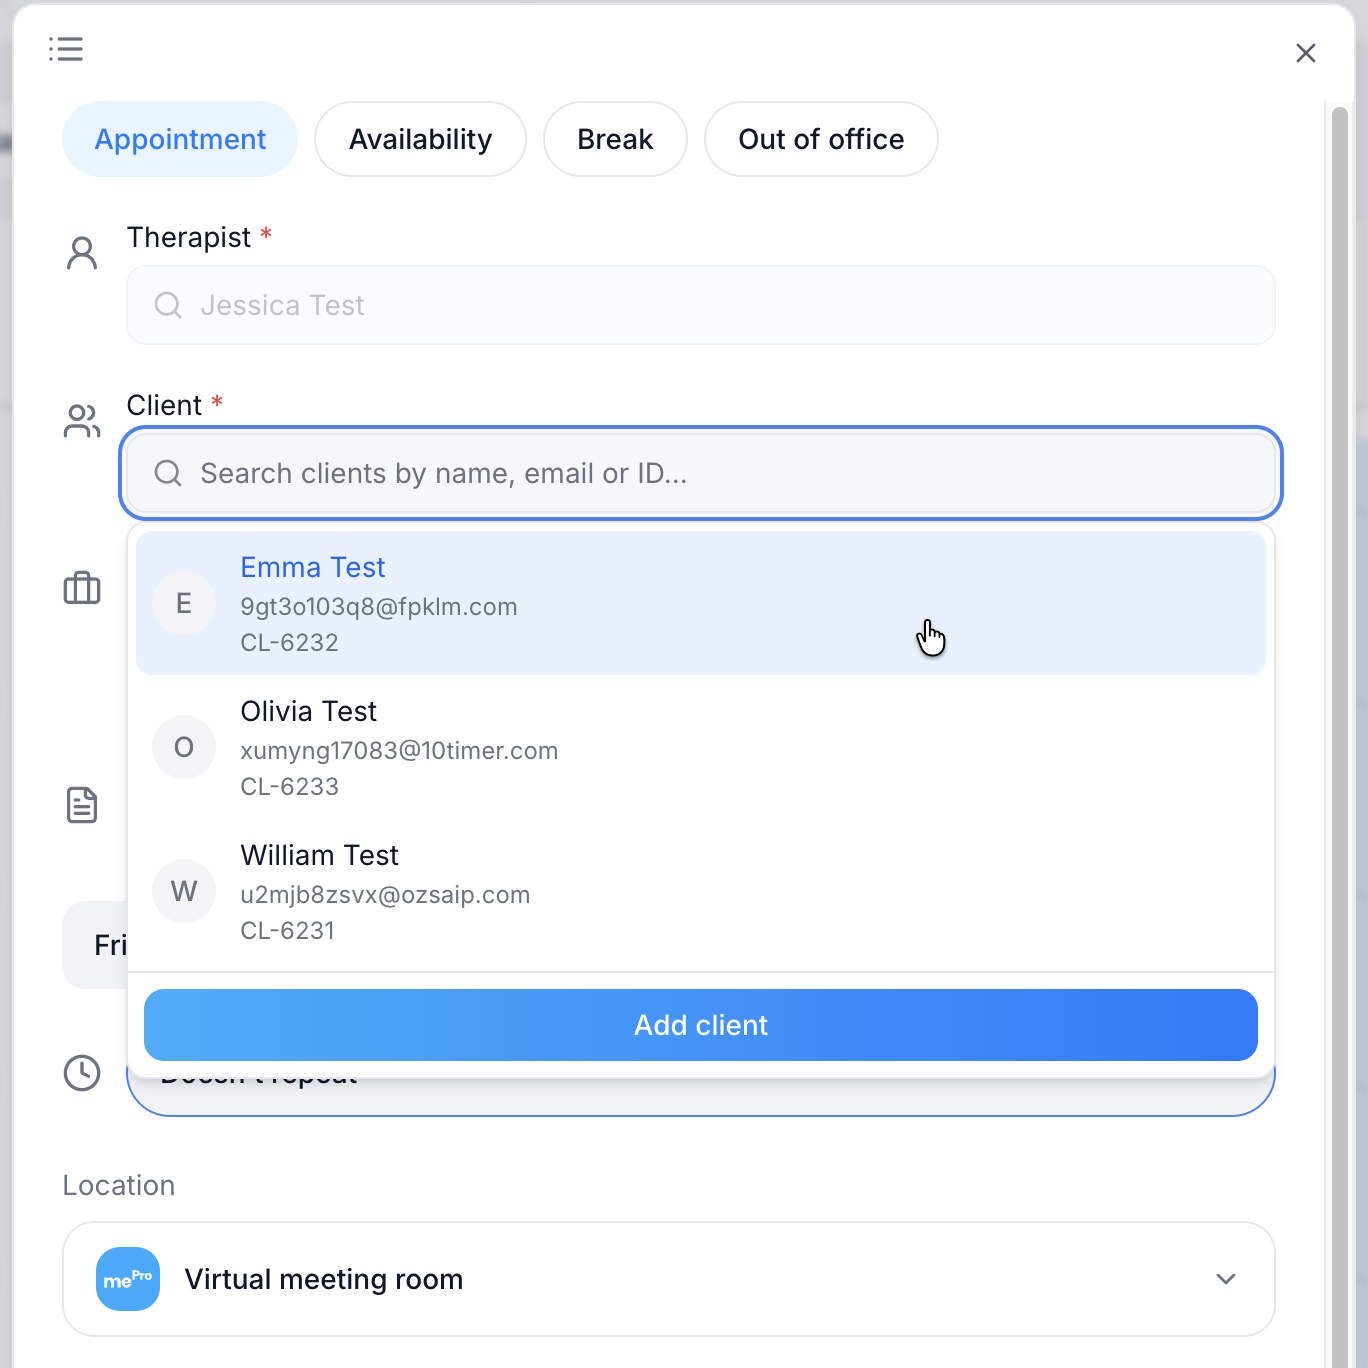
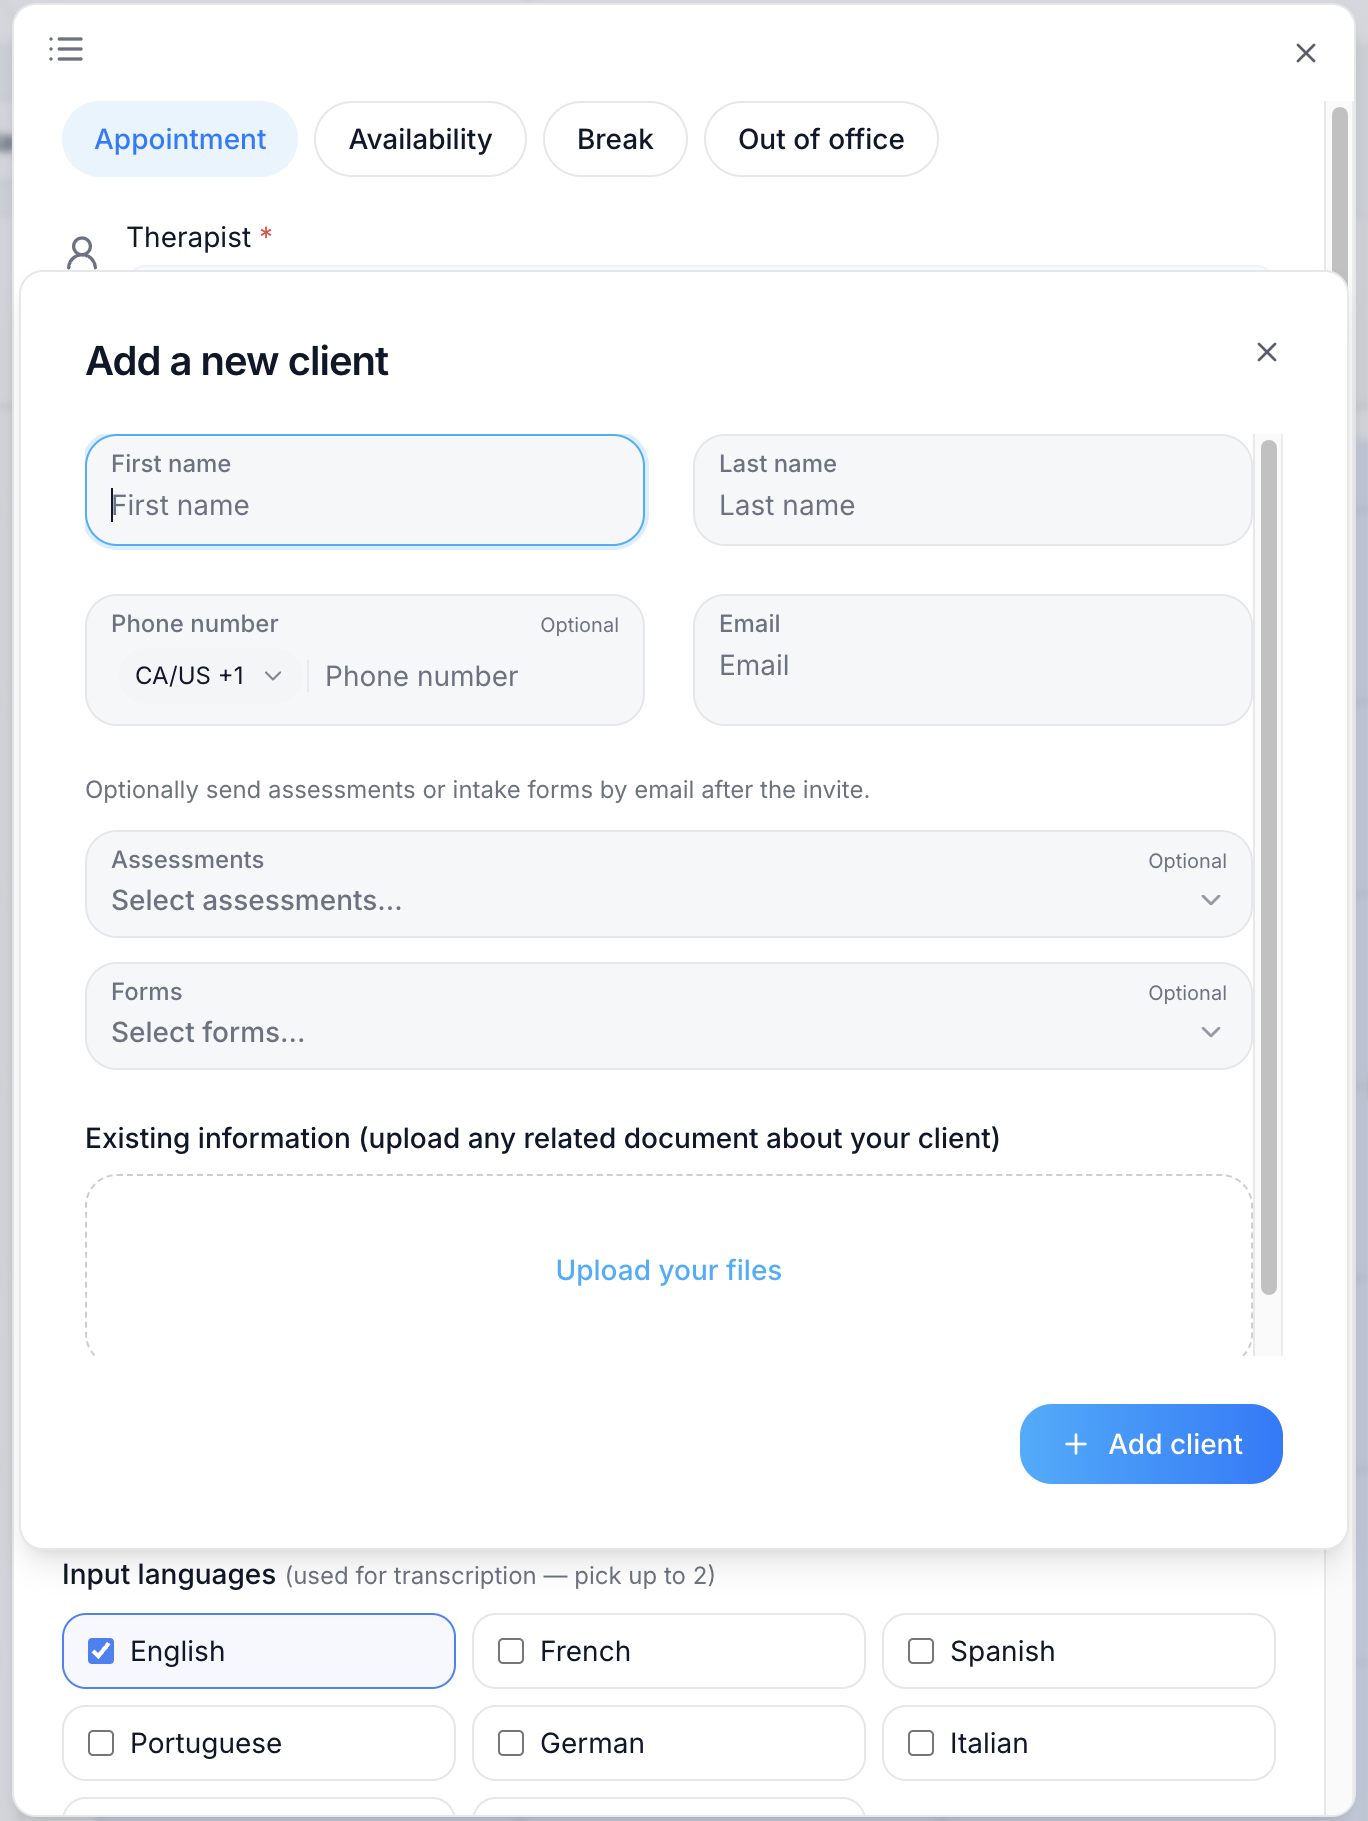
5. If the client is new, click Add client at the bottom of the list.
The Add a new client form opens on top of the appointment. Enter the client’s First name, Last name and Email, choose any Assessments or Forms to send, then click Add client. For the full steps, see Add a client in the Clients section.
6. Click Service and choose the service.
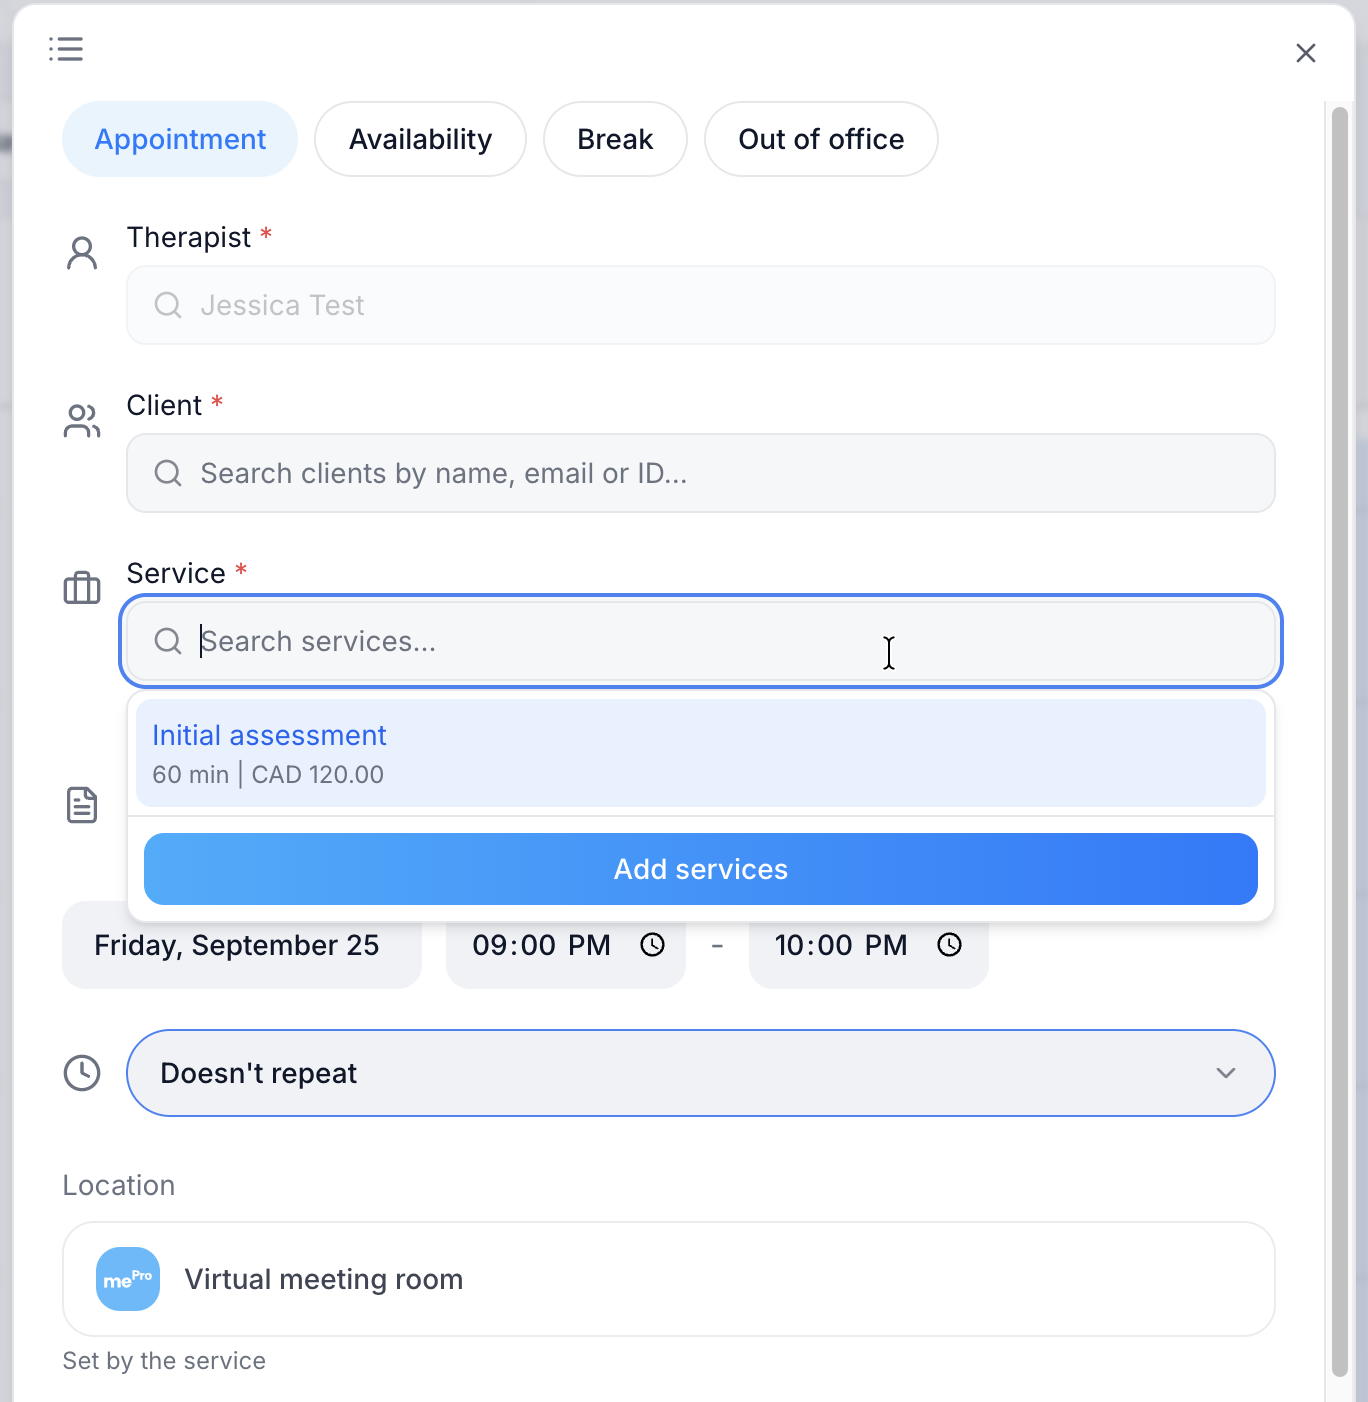
Each service shows its length and fee, for example Initial assessment, 60 min | CAD 120.00. The service also sets the appointment’s location.
If the service you need isn’t listed, click Add services to create it.
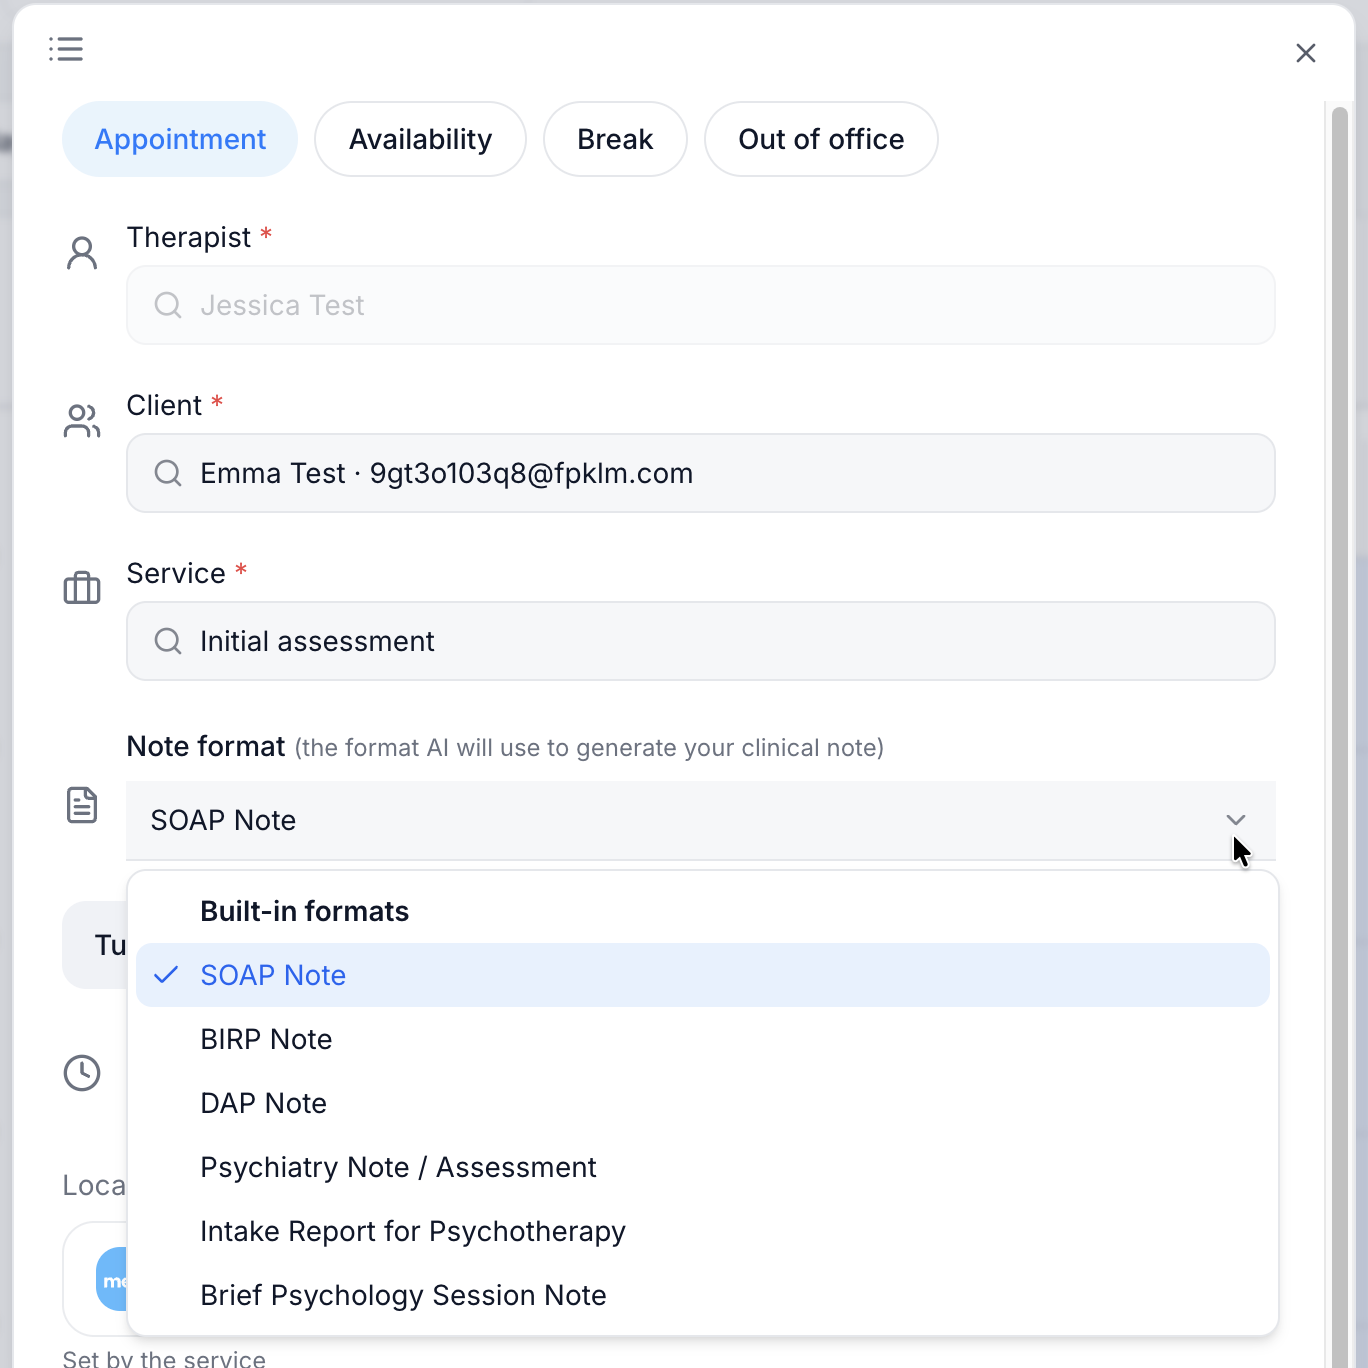
7. Choose the Note format.
This is the format AI will use to generate your clinical note. SOAP Note is selected by default. Under Built-in formats, you can also choose BIRP Note, DAP Note, Psychiatry Note / Assessment, Intake Report for Psychotherapy or Brief Psychology Session Note.
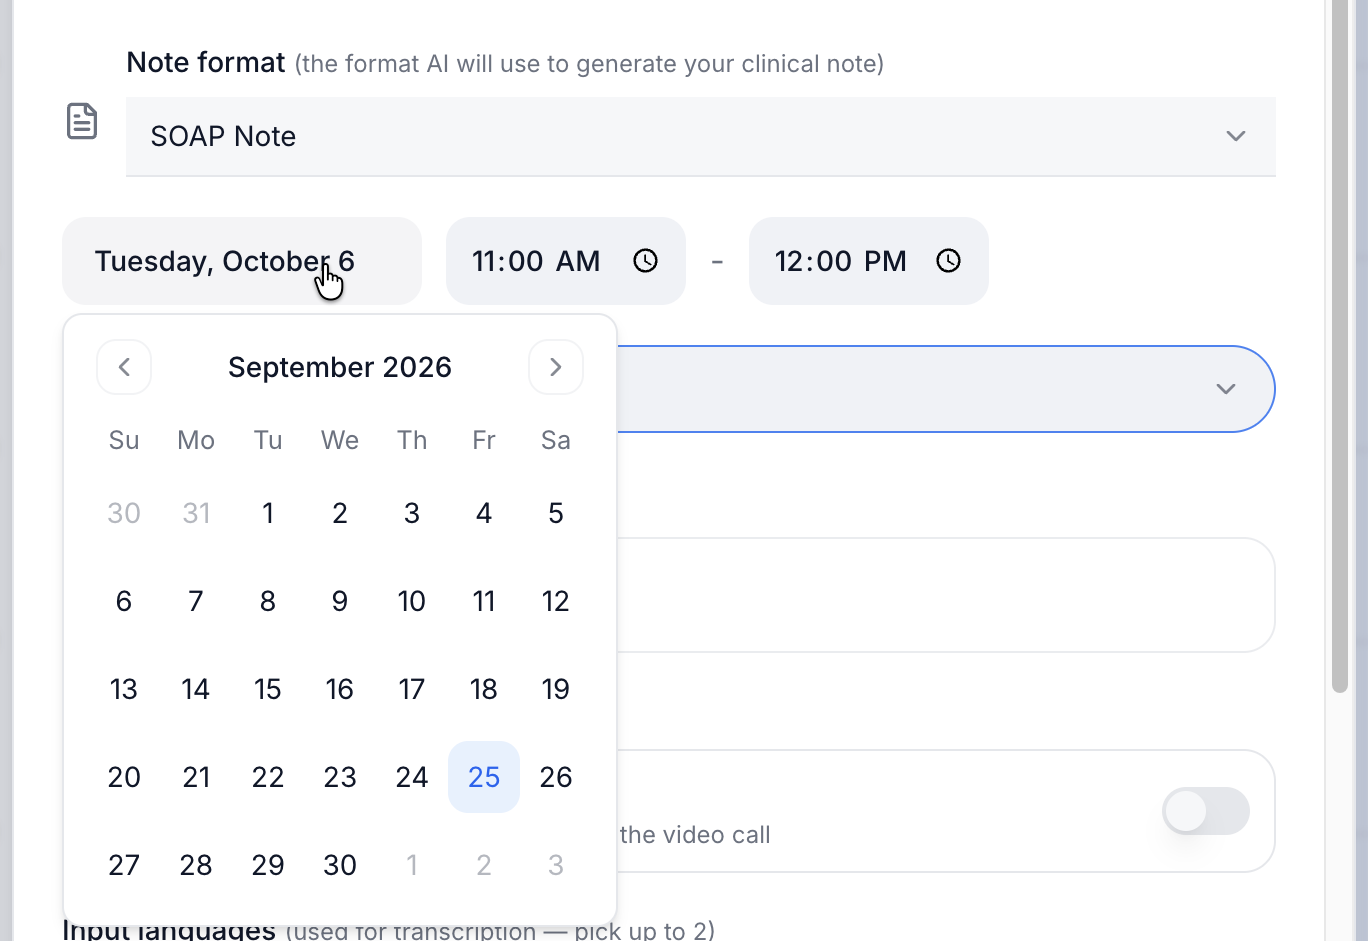
8. Check the date. To change it, click the date and choose another day.
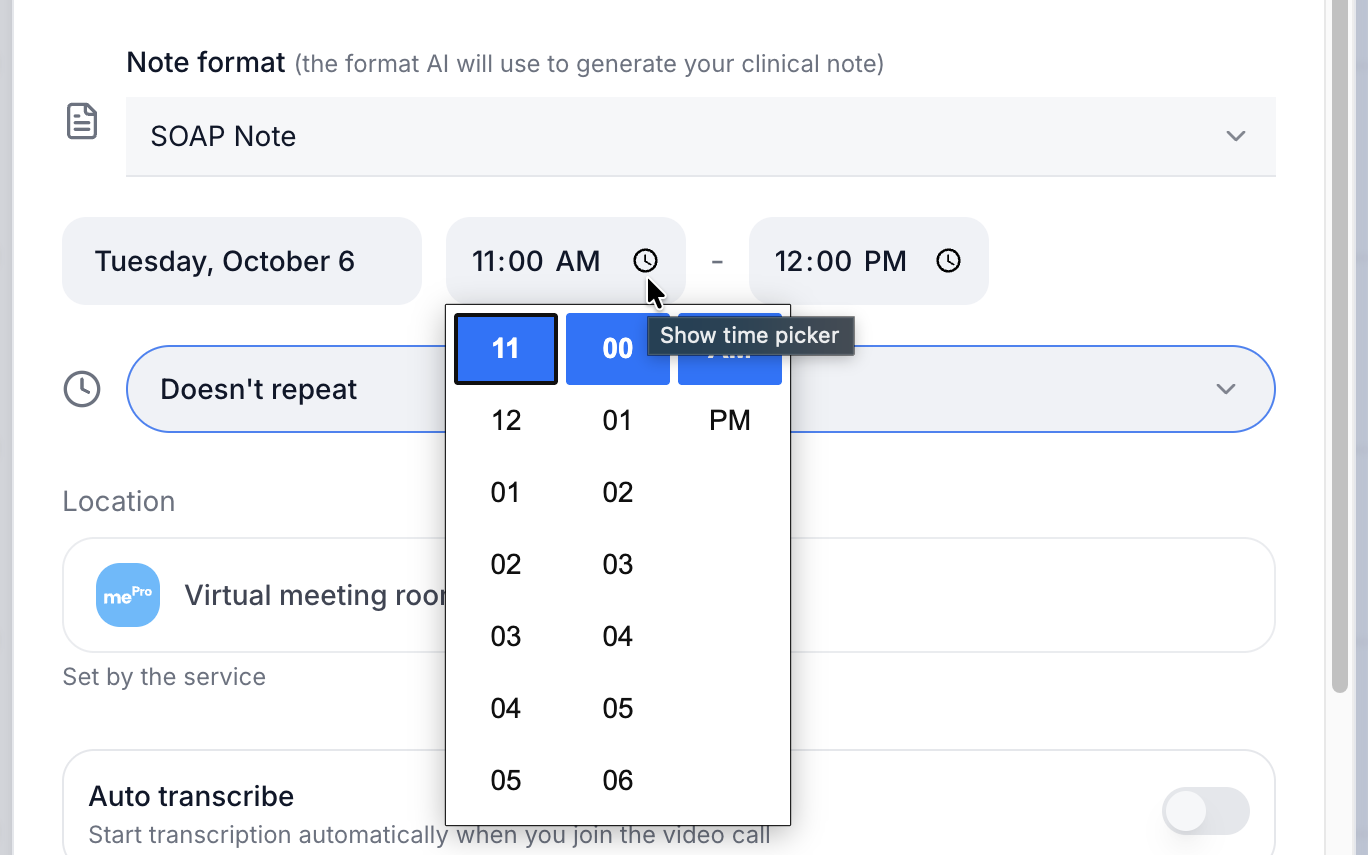
9. Set the start and end time.
Click the clock icon next to the start time (Show time picker), then choose the hour, minutes and AM or PM. Do the same for the end time.
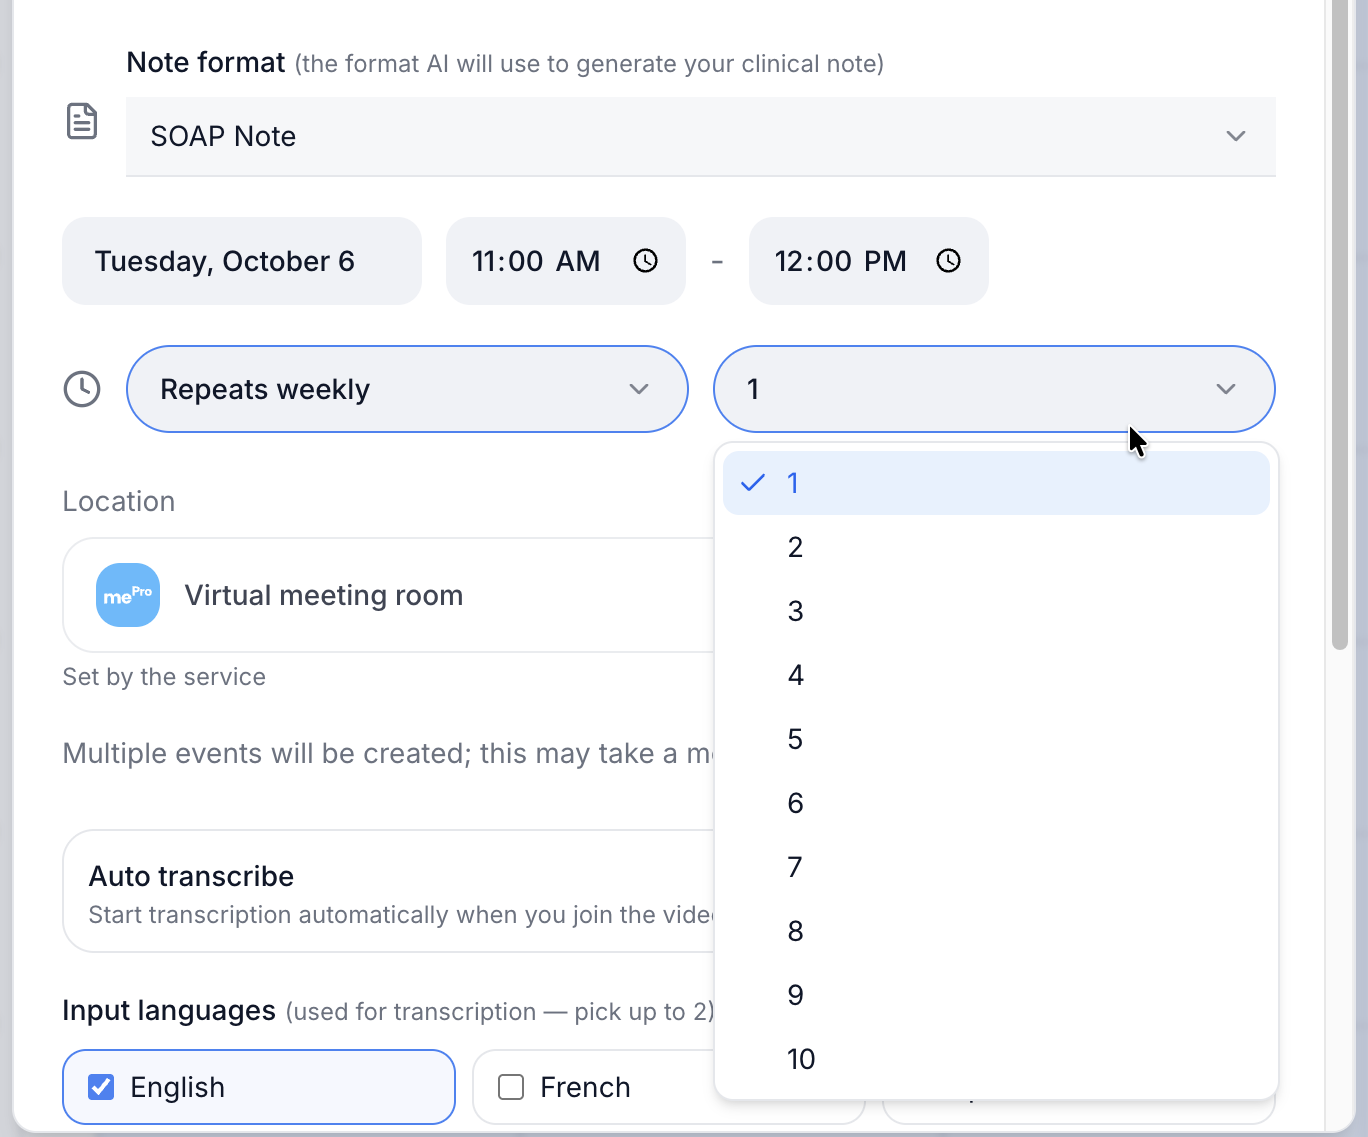
10. Choose whether the appointment repeats.
Click Doesn’t repeat to choose a repeat option, such as Repeats weekly. A second dropdown appears. Choose how many appointments to create, from 1 to 10.
mePro shows Multiple events will be created; this may take a moment. You can’t change the number of repeats after booking.
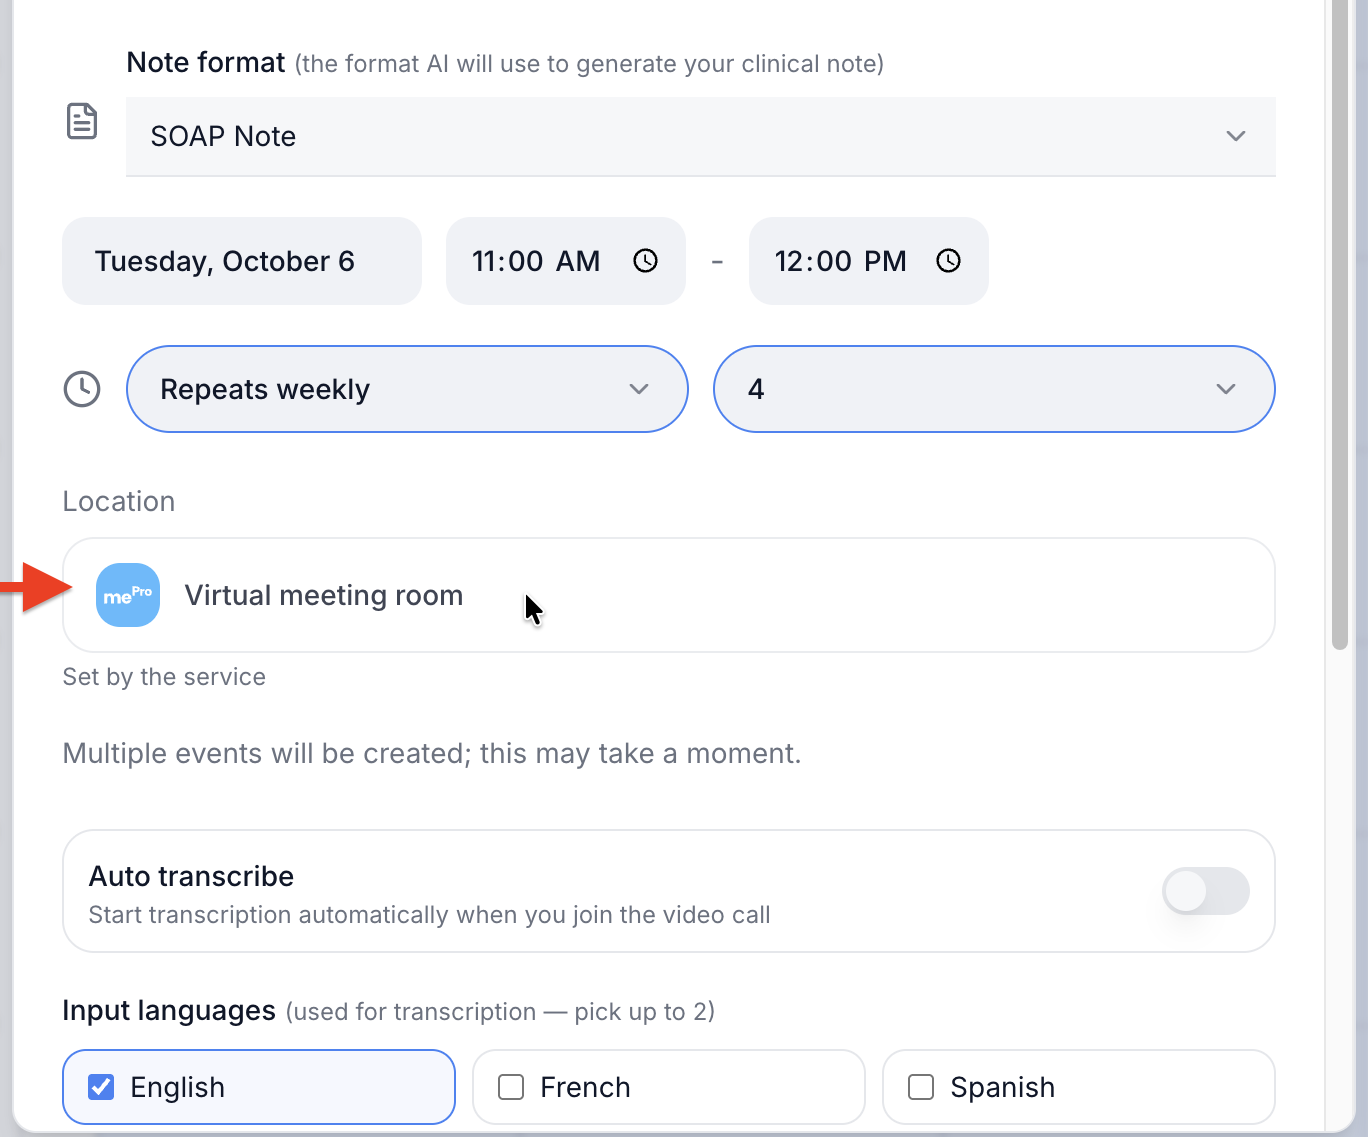
11. Check the Location.
The location is Set by the service. For a virtual service, it shows Virtual meeting room. To change the location, choose a different service.
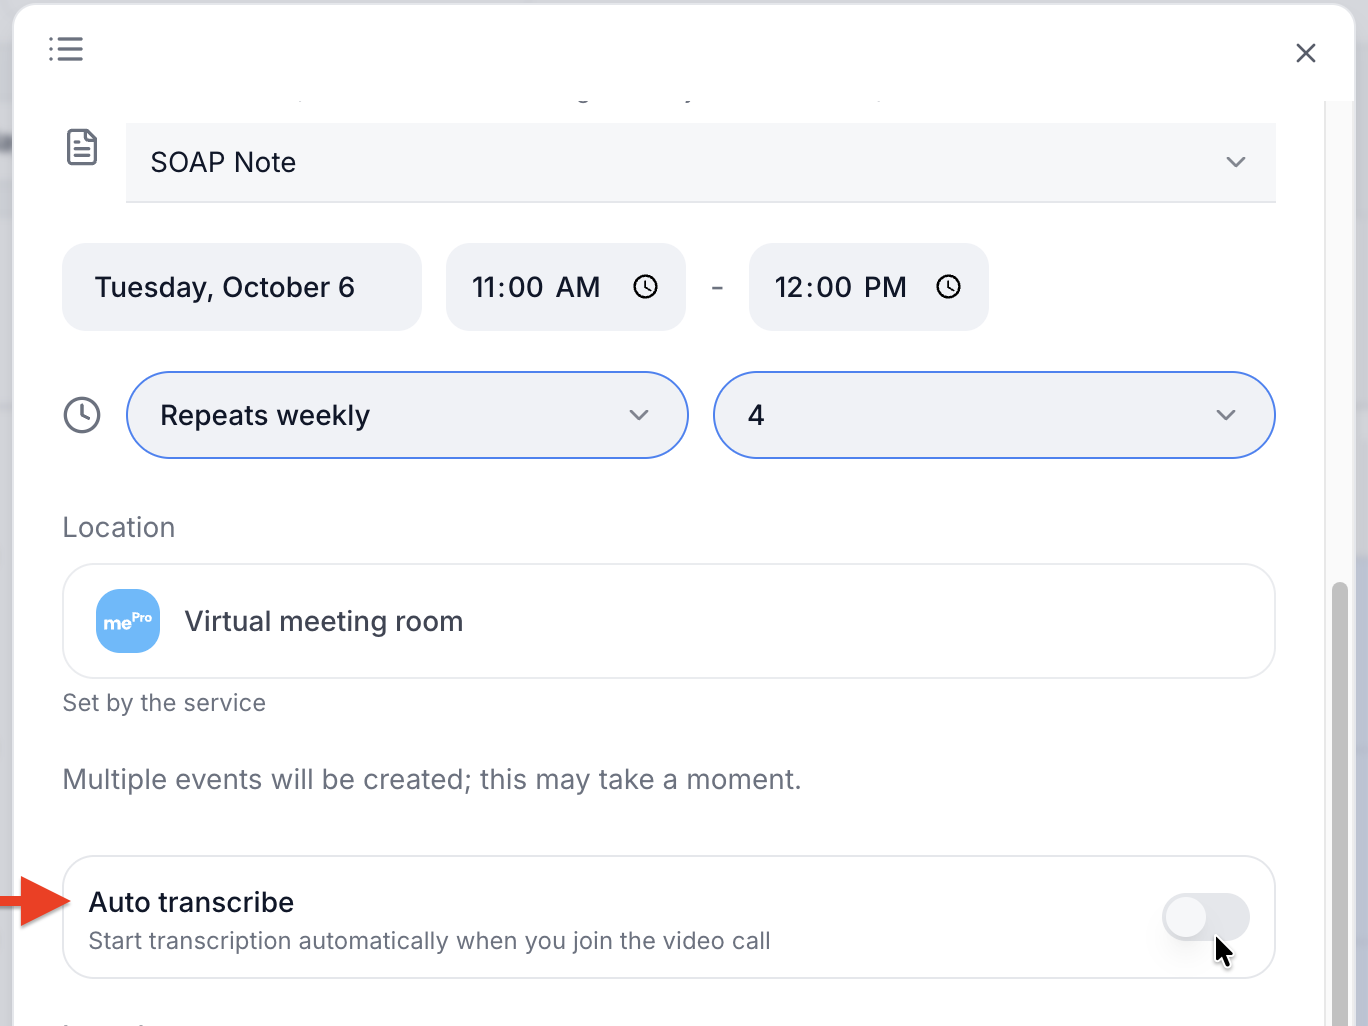
12. Optional: turn on Auto transcribe.
Click the switch to start transcription automatically when you join the video call. The switch turns blue when it’s on.
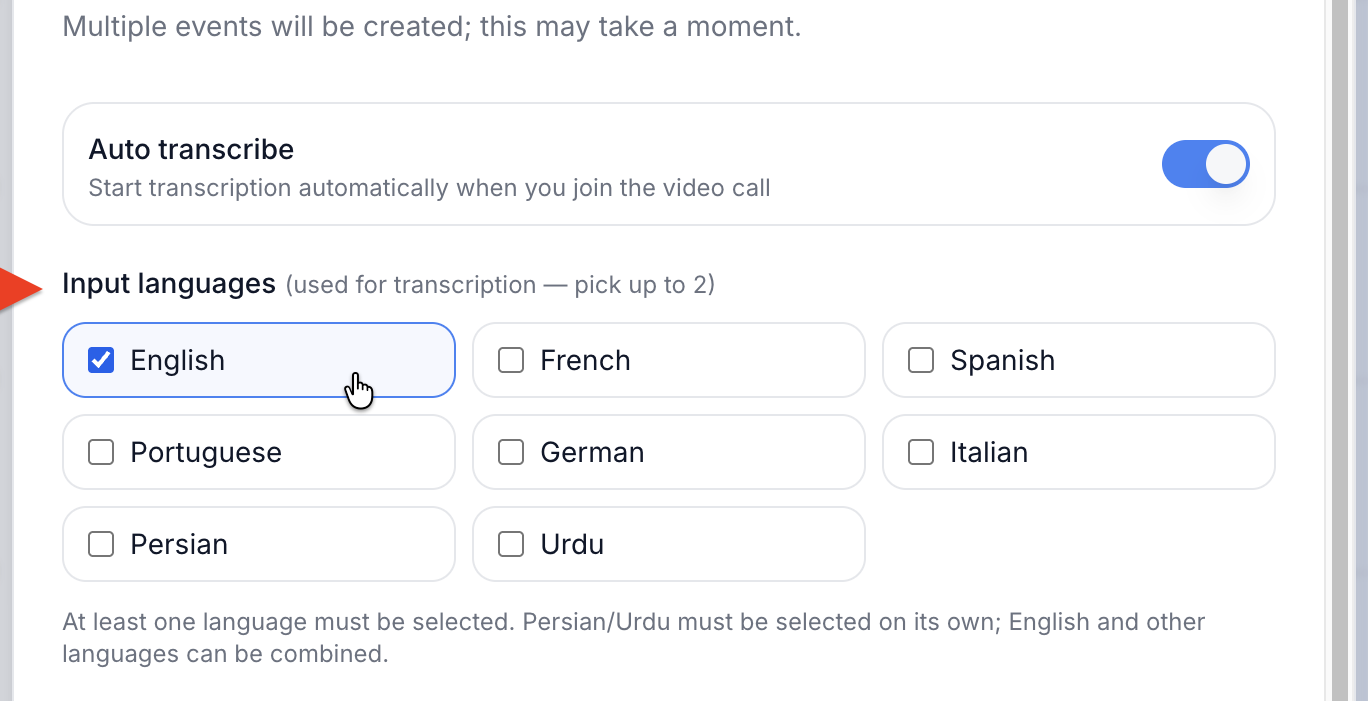
13. Under Input languages, select the language or languages spoken in the session.
You can pick up to 2. English is selected by default, and at least one language must be selected.
Persian or Urdu must be selected on its own. English and the other languages can be combined.
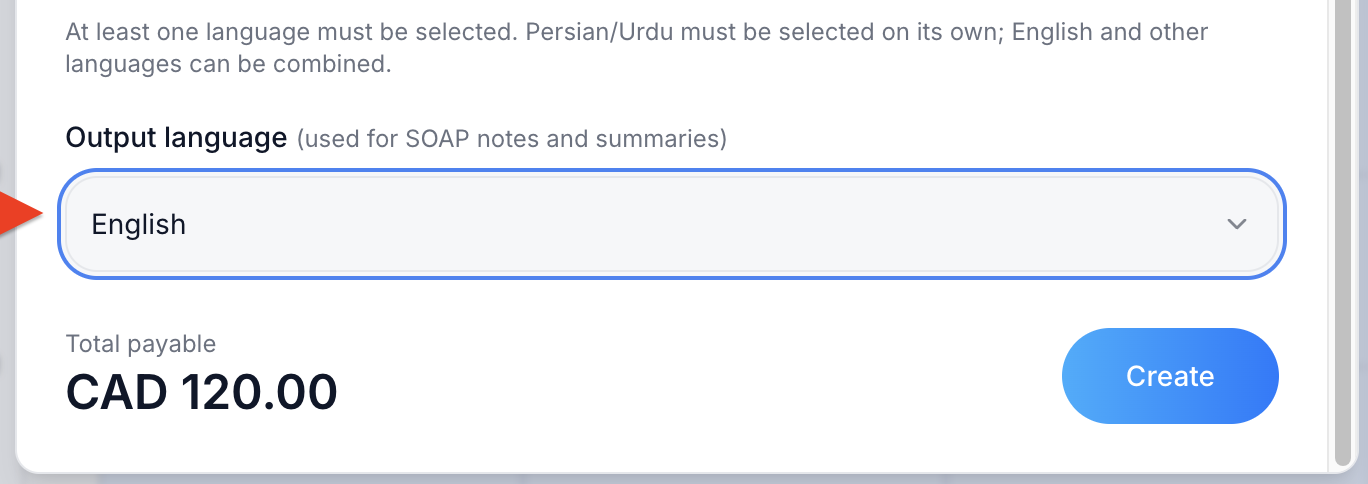
14. Under Output language, choose the language for your SOAP notes and summaries.
This can be different from the language spoken in the session.
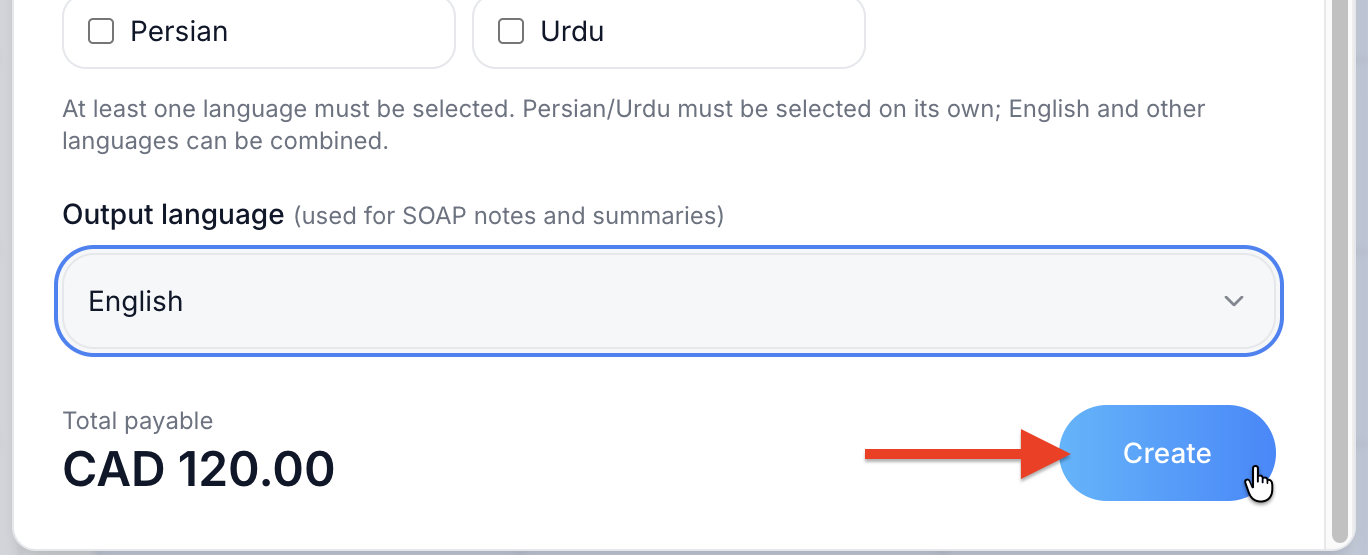
15. Check Total payable, then click Create.
Total payable comes from the service fee, for example CAD 120.00.
What you’ll see
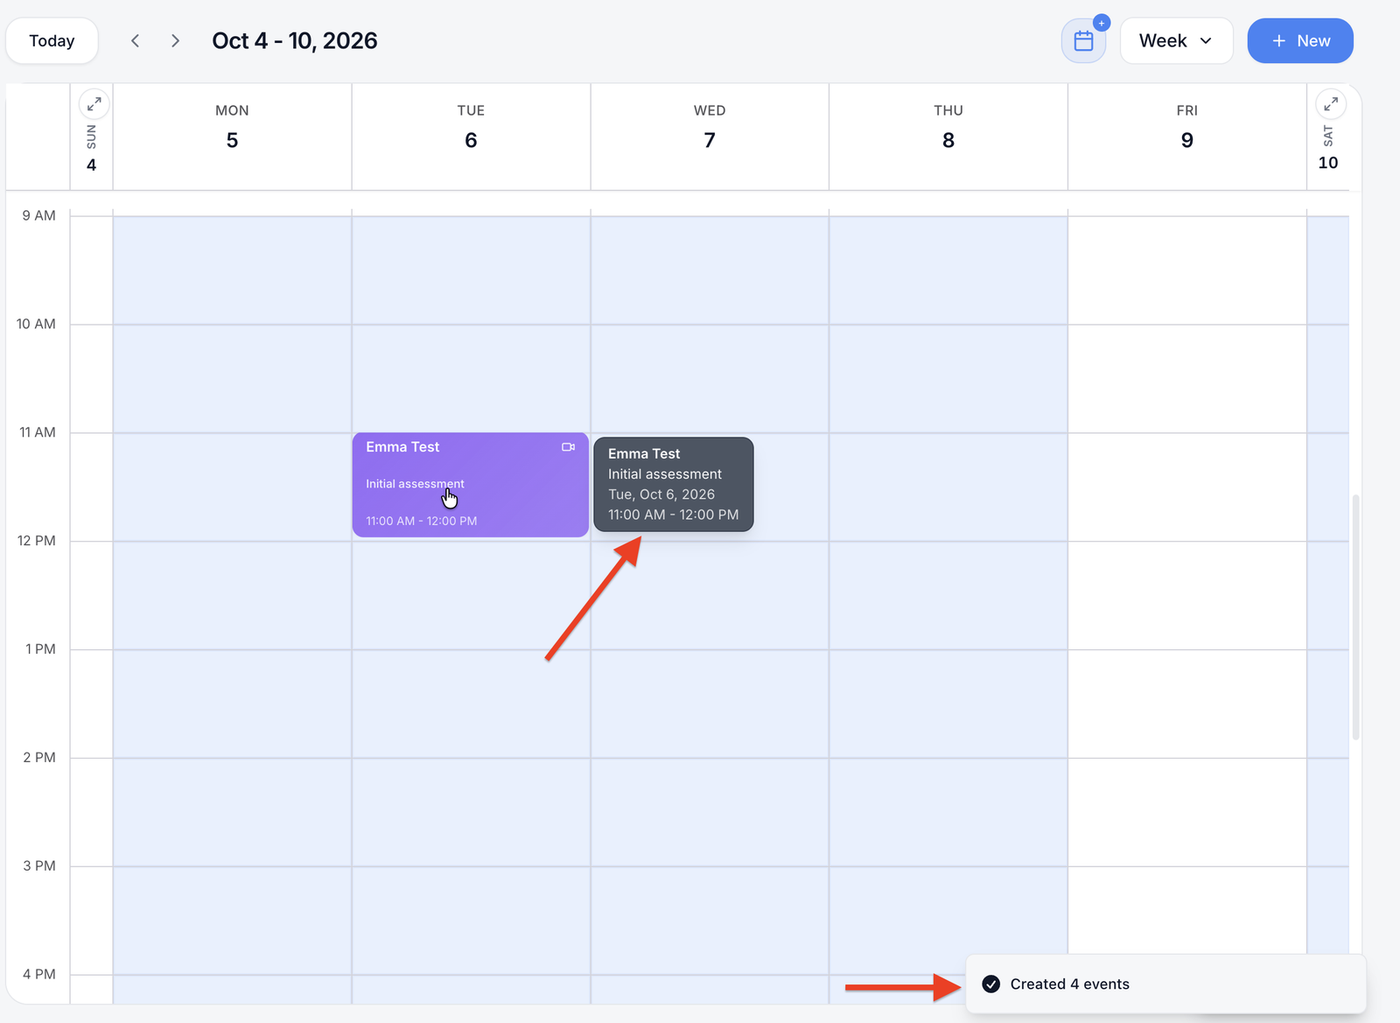
The form closes and the appointment appears on your calendar in the service’s color, with the client’s name, the service, the time and a video icon for a virtual session. For a repeating appointment, a message confirms how many were created, for example Created 4 events. Hover over an appointment to see its full date and time.
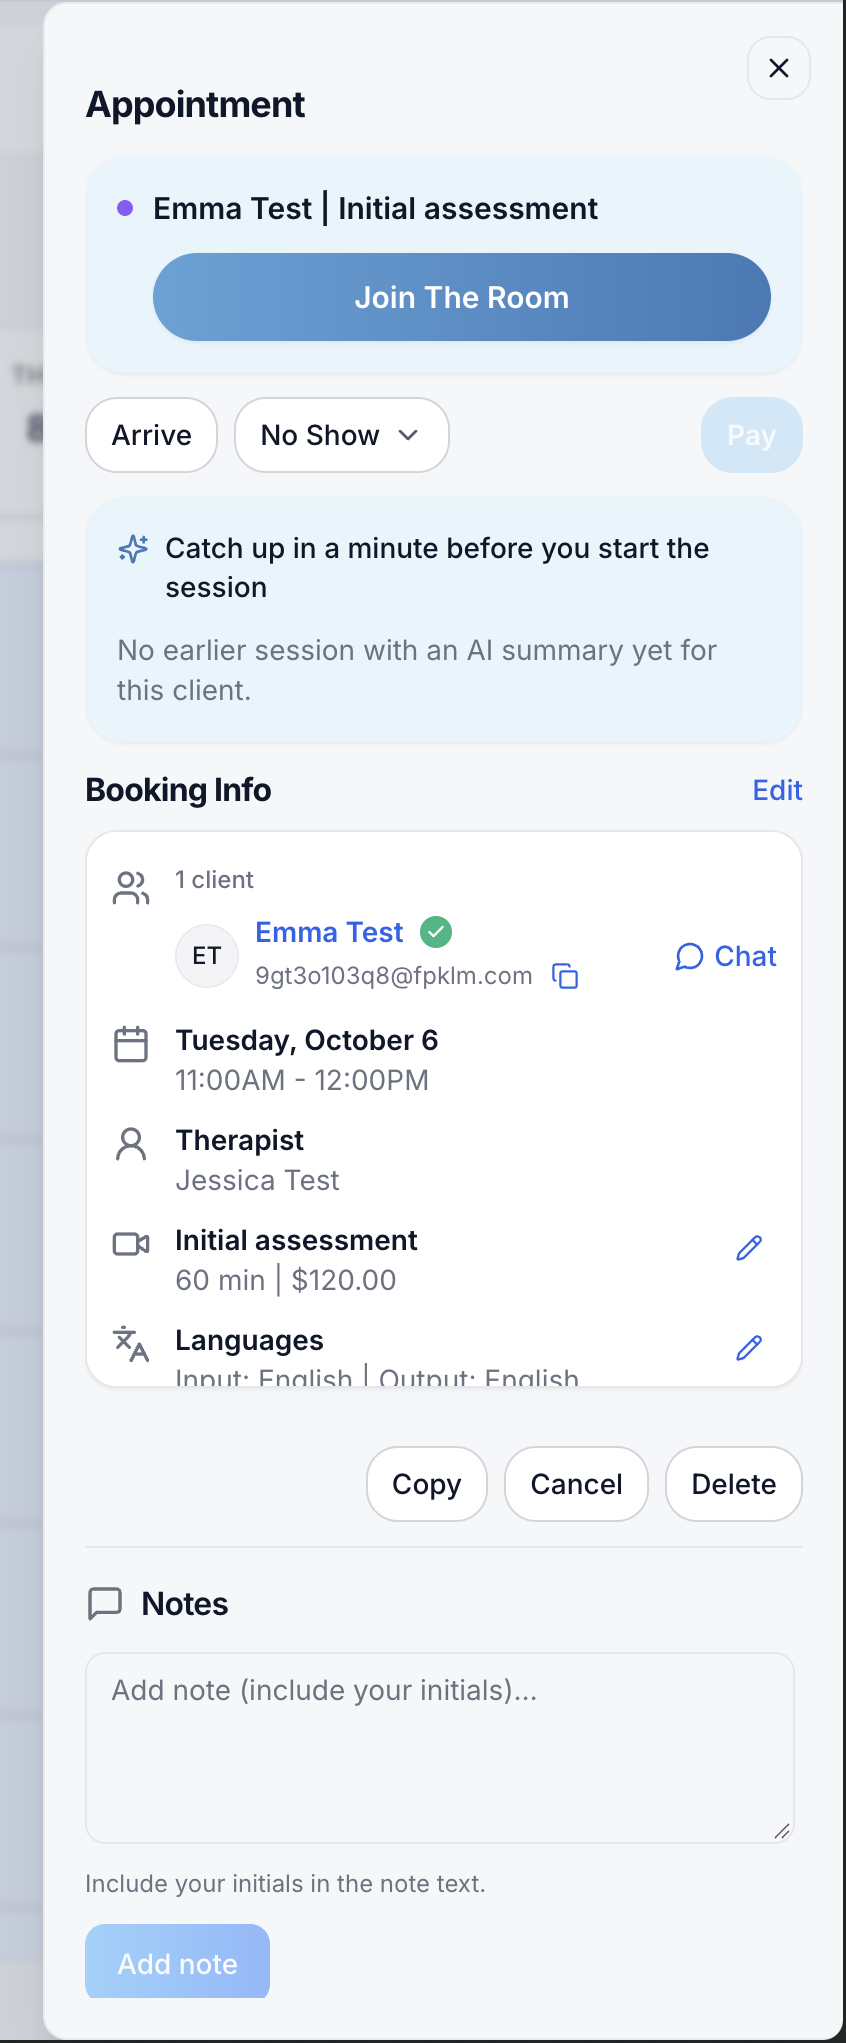
Click the appointment to open the Appointment panel. From here you can:
- Click Join The Room to start the virtual session.
- Mark the client as Arrive or No Show, or click Pay to take payment.
- Read Catch up in a minute before you start the session, an AI summary of the client’s earlier sessions. Before a first session, it shows that there’s no earlier summary yet.
- Check Booking Info: the client, date and time, therapist, service and languages. Click Chat to message the client.
- Click Edit to change the booking, or Copy, Cancel or Delete.
- Add a private note under Notes. Include your initials, then click Add note.
Tip: Click an empty time on the calendar instead of + New to save time. The date and time are filled in for you.